
Updates to the Volunteer Pipeline
This release includes some exciting updates to the volunteer pipeline that will help save you time and equip the right people with the information they need to starting vetting new potential volunteers.
Let’s cover the volunteer assignment time savings first. We have a few updates on this front:
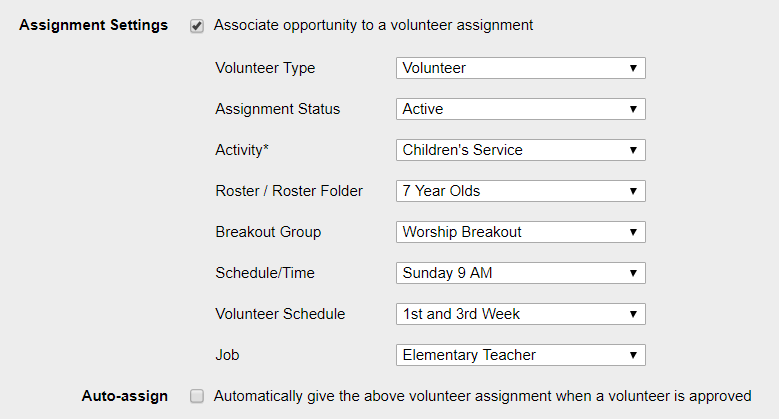
- When setting up an opportunity, you can now pre-define any assignment settings that should be associated to that opportunity. If using this feature, when you add an assignment to someone from the pipeline, the assignment settings you’ve selected will pre-populate on the Add Assignment page. You’ll be able to configure this once up front, and then save time on every assignment you add down the road! To set this up:
- Go to Volunteer > Volunteer Admin > Manage Opportunities
- Select an Opportunity
- Select “Edit” in the “General Information” section
- Check the box next to the new “Assignment settings” option, and you’ll be presented with some assignment details to optionally select (additional fields may populate after you select an activity)
- Select “Save”
- Now, from the “Approved” tab of the “View Applicants” page, when you add an assignment to someone, your selected fields will prepopulate.
- Building on the above improvement, there is also a new “Auto-assign” option on a volunteer opportunity’s “General Information” page. After you select this option, any newly approved applicants in the pipeline will be automatically given the volunteer assignment. No manual intervention needed. Talk about saving time!
This release includes some exciting updates to the volunteer pipeline that will help save you time and equip the right people with the information they need to starting vetting new potential volunteers.
Let’s cover the volunteer assignment time savings first. We have a few updates on this front:
- When setting up an opportunity, you can now pre-define
any assignment settings that should be associated to that opportunity. If using
this feature, when you add an assignment to someone from the pipeline, the
assignment settings you’ve selected will pre-populate on the Add Assignment
page. You’ll be able to configure this once
up front, and then save time on every assignment you add down the road! To set
this up:
- Go to Volunteer > Volunteer Admin > Manage Opportunities
- Select an Opportunity
- Select “Edit” in the “General Information” section
- Check the box next to the new “Assignment settings” option, and you’ll be presented with some assignment details to optionally select (additional fields may populate after you select an activity)
- Select “Save”
- Now, from the “Approved” tab of the “View Applicants” page, when you add an assignment to someone, your selected fields will prepopulate.
Building on the above improvement, there is also a new “Auto-assign” option on a volunteer opportunity’s “General Information” page. After you select this option, any newly approved applicants in the pipeline will be automatically given the volunteer assignment. No manual intervention needed. Talk about saving time!
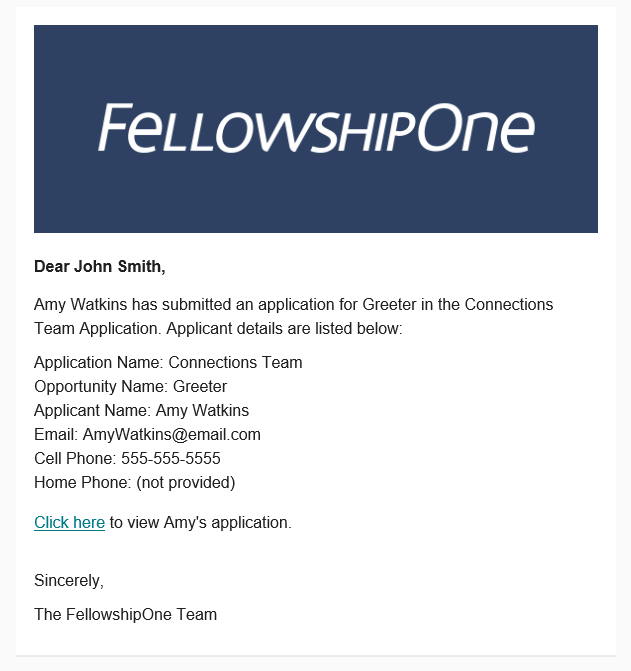
Next up for the volunteer pipeline are email notifications sent to designated Portal users for new applicants. This is especially helpful for users who want to know if there are new applicants to a volunteer opportunity for which they are responsible, but they don’t want to log in to the F1 Portal to see it. These individuals can now receive an email with the applicant’s name and contact information, which application and opportunity they applied for, and a link that takes them directly to the individual’s volunteer application in the F1 Portal.
Two key pieces to know to set this up:
- A Portal user who wants to receive notifications can opt in to the emails on the My Account page. Select your profile image in the top-right of the Portal header, and then select the “My Account” option. Select the “Assigned Volunteer Applicants” checkbox and save your changes.
- Users who have opted in also need to be designated as a “Responsible User” for any volunteer opportunities for which they would like to receive notifications. To do this:
- Go to Volunteer > Volunteer Admin > Manage Opportunities
- Select an Opportunity
- Select “Edit” in the “Follow-Up Responsibility” section
- Select the individual’s name from the dropdown and select “Add to list”
- Note: if the individual is not in this list to be selected, they are either already a responsible user (and will show up in the table below the dropdown), or they do not have Ministry Read or Ministry Write security rights to the ministry associated to the given volunteer opportunity.
- Select “Save”
Pages with a New Design
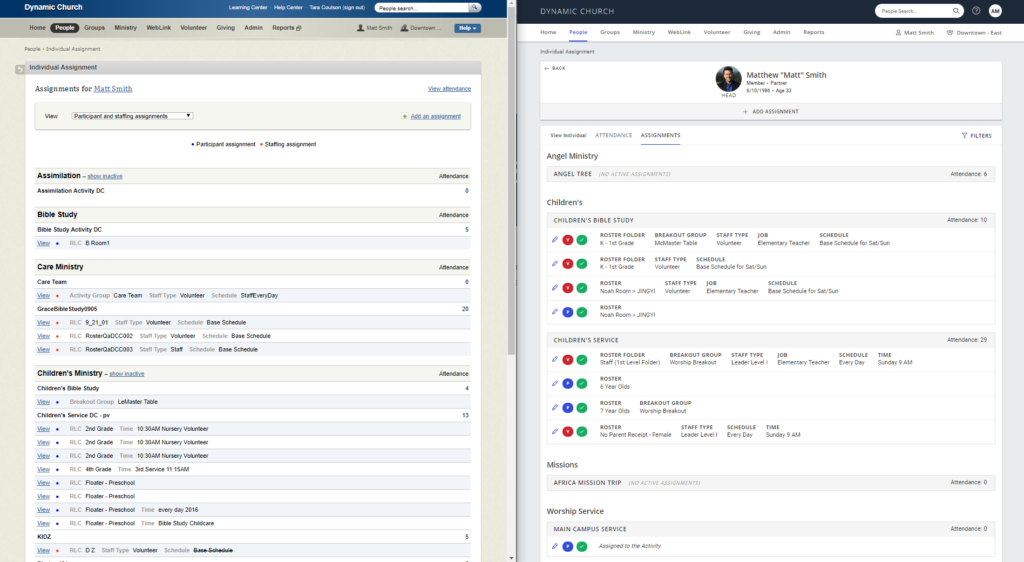
There are 10 pages that received an updated design with this release. You’ll notice updates when adding new households and individuals, viewing someone’s assignments and attendance, entering headcount, and viewing Live Check-ins. For all the nitty-gritty you can check out the Release document, but here are a couple comparisons!
Viewing an Individual’s Assignments
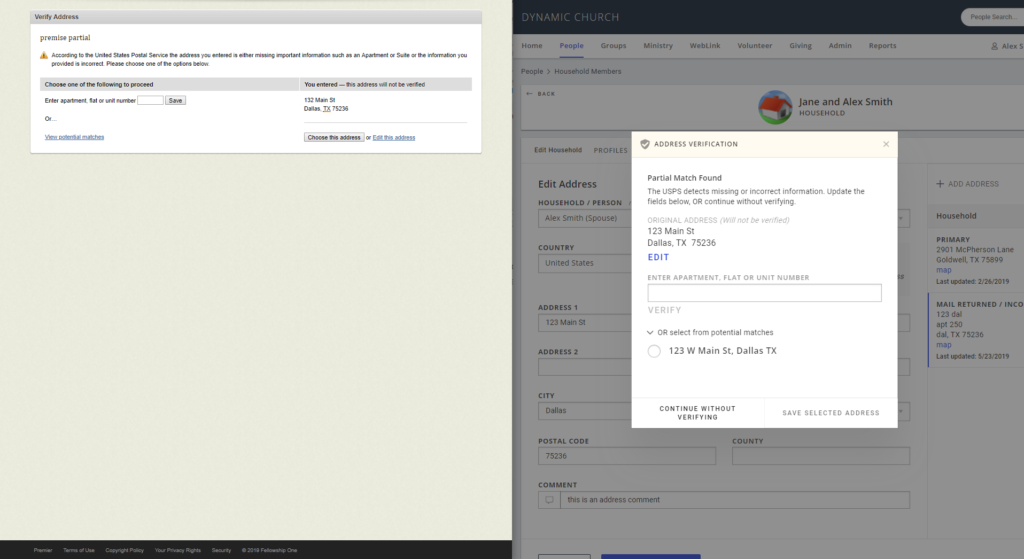
Address Verification when Adding/Editing Addresses:
Viewing Event Registrations and Volunteer Applications on an Individual’s Record
In an upcoming release, we will be adding two new “cards” to the Individual page that give insight into the event registrations and volunteer applications they have submitted. We’re not quite finished yet, but it will likely look very similar to this:
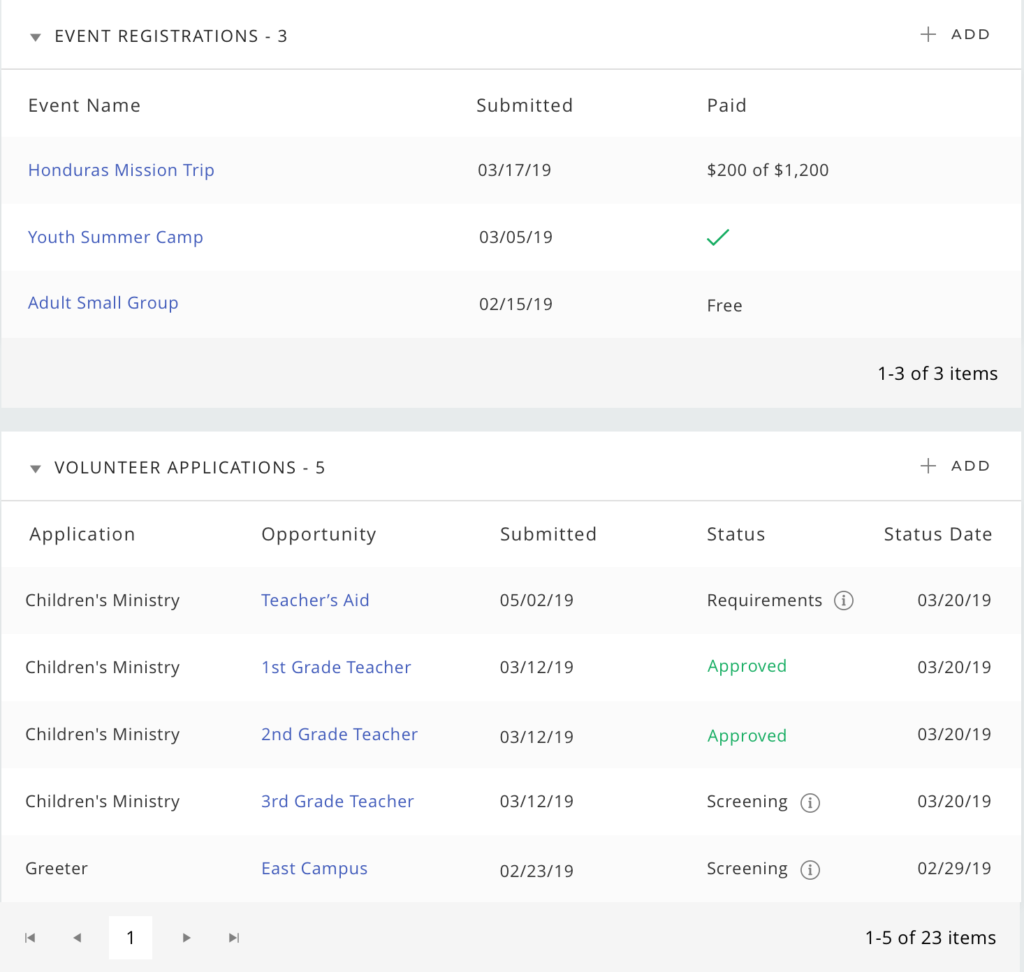
When this releases, you’ll have even greater insight into someone’s involvement at your church, and this will be super helpful when identifying where new and/or duplicate records came from when all you previously new at a glance was that they were “New from Website.” And you’ll be able to use the new “Edit Page Settings” feature to arrange these cards on the page however you’d like. Exciting stuff!
One action to take now: If you have any event registrations or volunteer applications that are more sensitive in nature (like a form for a Recovery group or Divorce Care, for example), and you don’t want all Portal users to see those forms on individuals’ records, then you’ll want to flag those forms/applications as “confidential”. In doing so, when the new cards go live, only users with the “WebLink” and “Volunteer Pipeline” security rights will have access to see these confidential Event Registrations and Volunteer Applications (respectively). To set them as confidential:
- For event registrations:
- Go to WebLink > Event Registration > Manage Forms
- Select the appropriate form
- In the “General Information” section, select the “Restrictions/Availability” link
- In the “Form Properties” section, select the “Confidential” checkbox
- Select “Save settings”
- For volunteer applications:
- Go to Volunteer > Volunteer Admin > Manage Opportunities
- Select the Application which the Opportunity is within
- Select the appropriate opportunity
- In the “General Information” section, select “Edit”
- Select the “Confidential” checkbox
- Select “Save”
After performing the above, you’ll be all set for the new cards to be released! Stay tuned for an exact release date – we’re exciting to communicate that out in the near future!